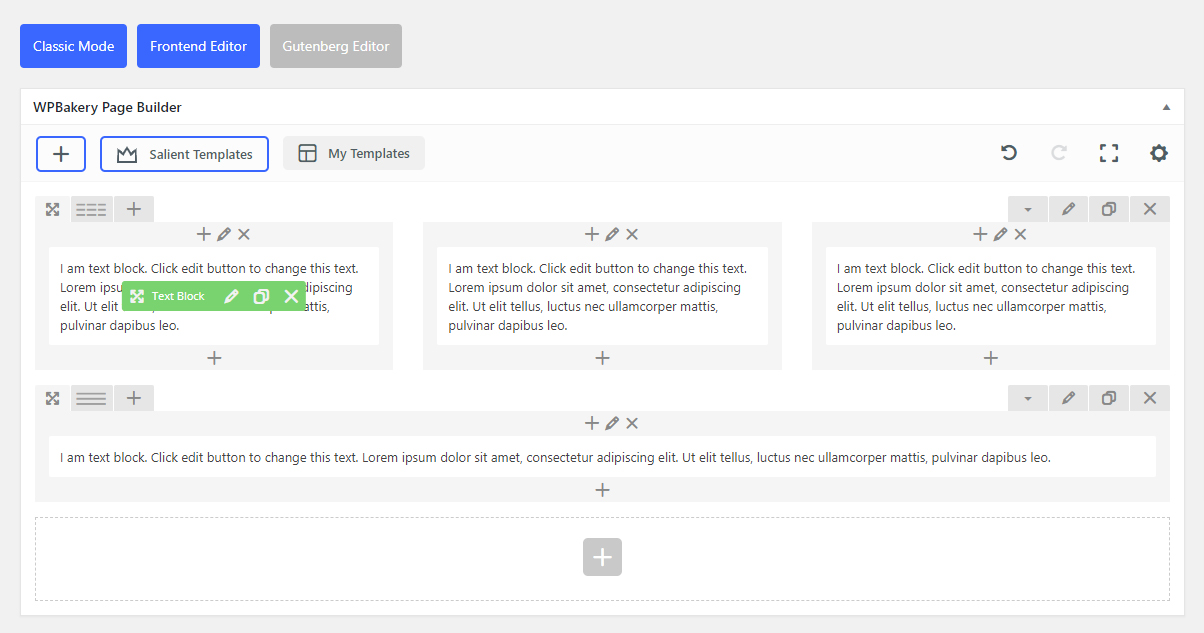
The Salient Page Builder is a highly tailored version of the popular plugin WPBakery Page Builder (formerly Visual Composer). Using it unleashes the true power of Salient as many elements are unique and handcrafted exclusively by ThemeNectar. Below is a guide of the various sections of the interface, hover over the hotspots to get familiar with where things are located.
How to Use the Salient Page Builder

How to Edit Specific Page Elements
Edit Existing Text

1. Read the text in the blocks to find the section with text you’d like to update.
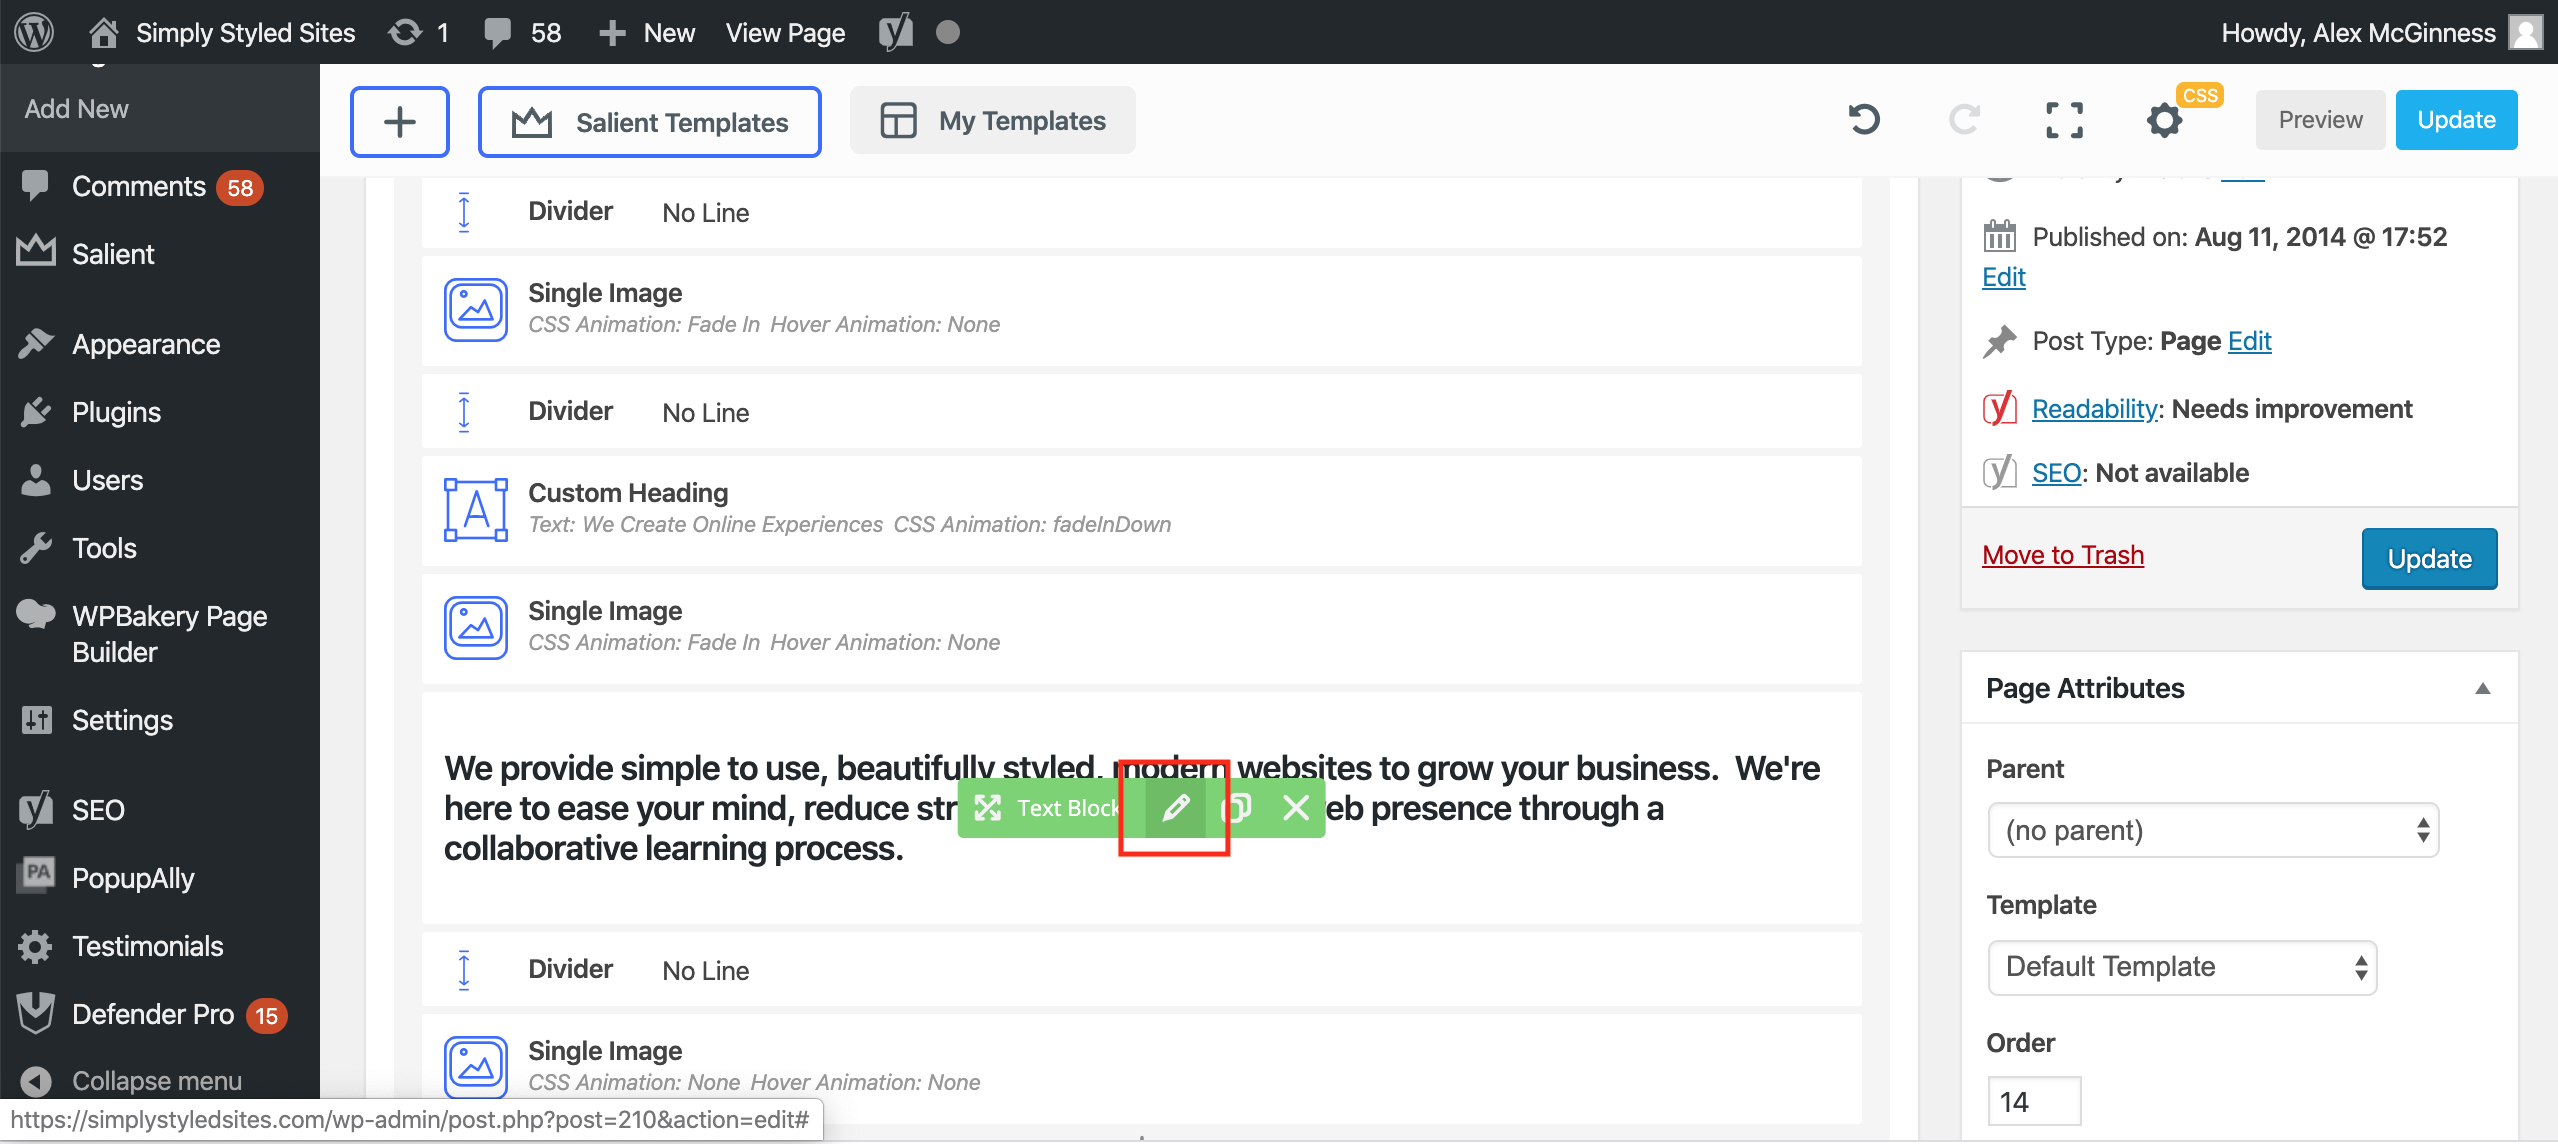
2. Once you find the section you’d like to update, hover over the section and click on the pencil icon to edit the text.

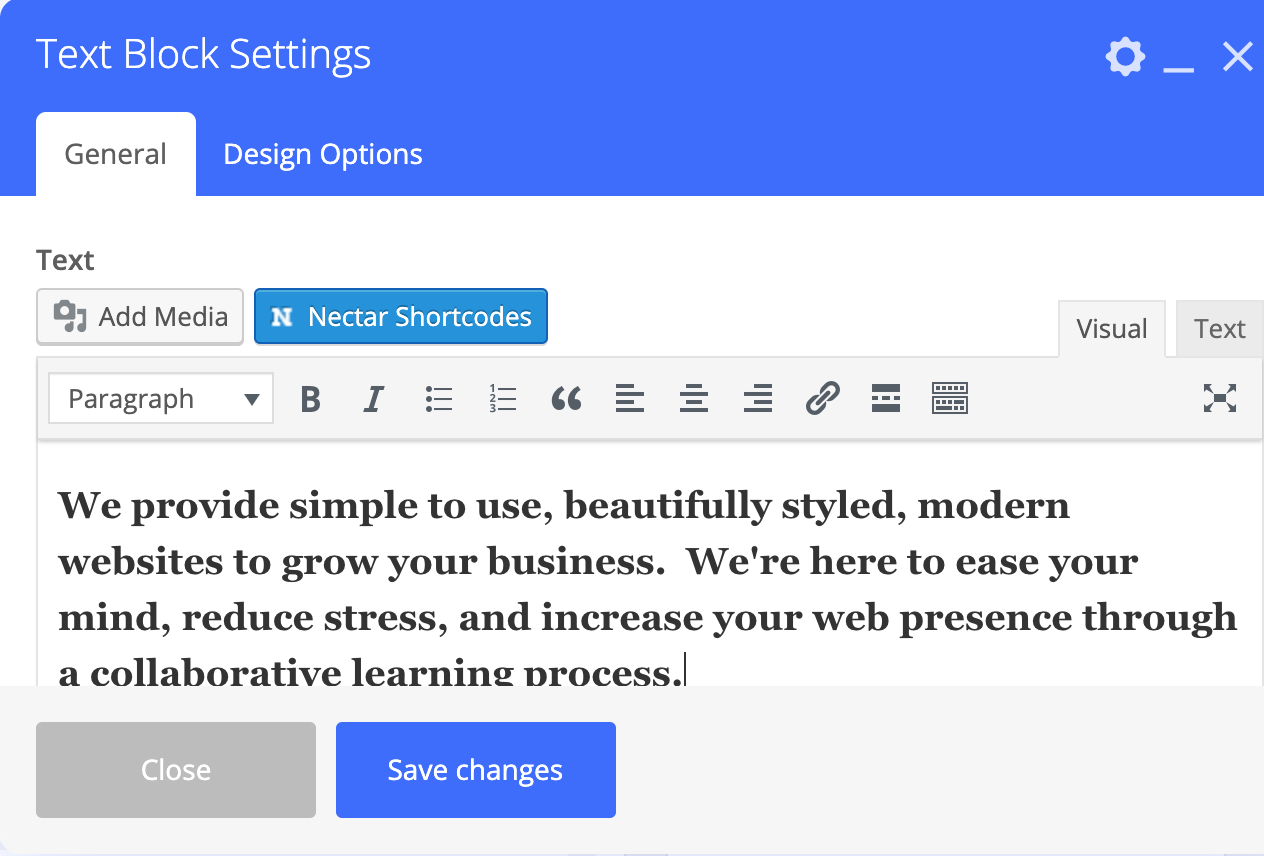
3. In the pop up that opens, edit the text you’d like to change.
4. Hit Save Changes to update the text.

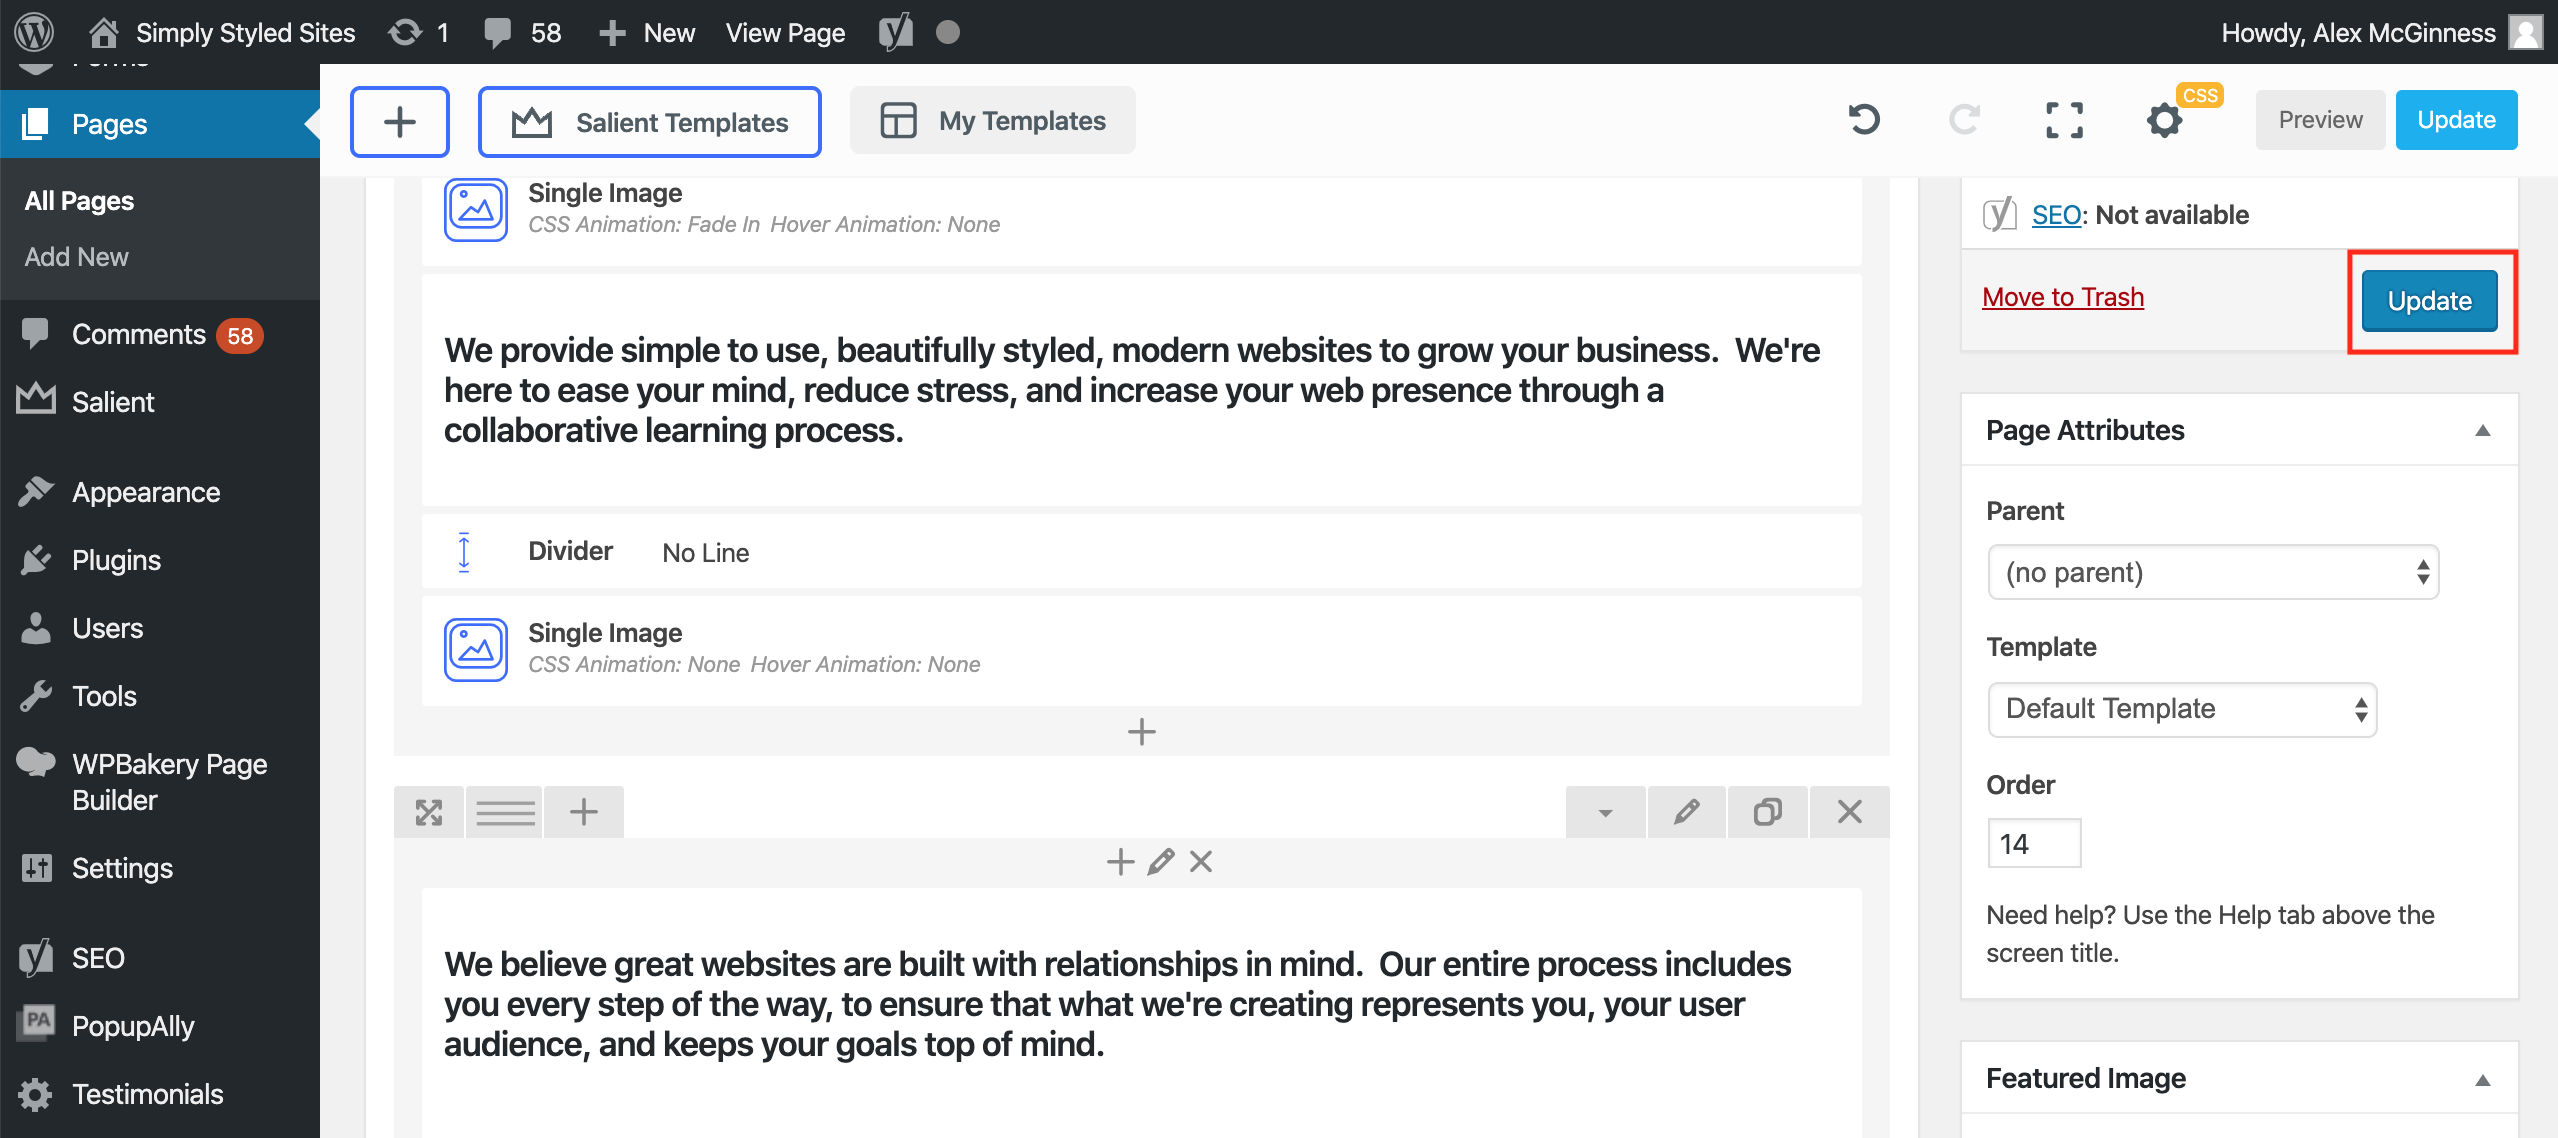
5. Press Update in order to save the changes you’ve made to the page. If you don’t do this, the text updates will not save to your live site.
Edit Images

1. Read the headings in the block sections to find one marked as an image.

2. Hover over the block and select the pencil icon to edit the image.

3. In the pop up that appears, you’ll see the image that is currently loaded on the site.
4. Click the green plus button to upload your new image.
5. To remove the image that’s already there, simply click the red x over the image.
6. You can change the alignment of the image, if needed.
7. Press Save Changes to complete the edit.

8. Press Update in order to save the changes you’ve made to the page. If you don’t do this, the image updates will not save.
Add a Blog Post

1. Hover over Posts section on WordPress dashboard. Then click on All Posts.

2. At the top of the page, click Add New.

3. At the top of the page, click WPBakery Page Builder.

4. Add the title of your blog post into the title bar.

5. Write the rest of your article in the large text box. You can insert images, as needed, in this area as well.

6. Select a category for your blog post in the Category box on the right side of the page. If the category you want is not listed, you can create a new category by selecting Add New Category.

7. Use the Featured Image section to add an image in association with your blog post. This image will display in your blog feed with the post, on your home page if you have a blog feed there, and also on social media if the blog post is shared that way.

7. If you would like to change the date your blog is published, click edit after Publish Immediately in the Publish area. Set the date you would like the blog post to be published, then click OK.

8. Once you have finished writing and editing your blog post, hit the Publish button on the top right to save your changes and publish the post. Note: If you changed the date of your post to a day in the future, the post will be scheduled to go live on that date. This means you can write posts in advance and schedule them to go live at a later date!


